I2C in a nutshell
An Arduino/microcontroller itself is fun, and you can do the blink pretty fast, but as soon was we mastered the first steps we want to add more parts.
One way to add parts to your Arduino is by talking to them via I2C. Now, you can read all the (correct) details about this bus on wikipedia here: https://en.wikipedia.org/wiki/I%C2%B2C …
… or you can take the short version:
An I2C device usually has at least four pins:
VCC(+)GND(-)SCL(clock)SDA(data)
Now, the first two are obvious: we need a power supply (usually 3.3V or 5V check first).
The other two are also simple: We send bits via the serial data line (SDA), and to make sure when we can read a bit we need a serial clock (SCL). As we are talking on a bus, we need a controller (master) that tells exactly which device (slave) is supposed to do what (i.e. read/write data from/to an address).
A sensor would specify which address to read to get sensor data, a display would specifiy which addresses to write pixels to, to update the display.
The good thing is, there are tons of Arduino libraries that do exactly this that let us copy&paste our code really fast.
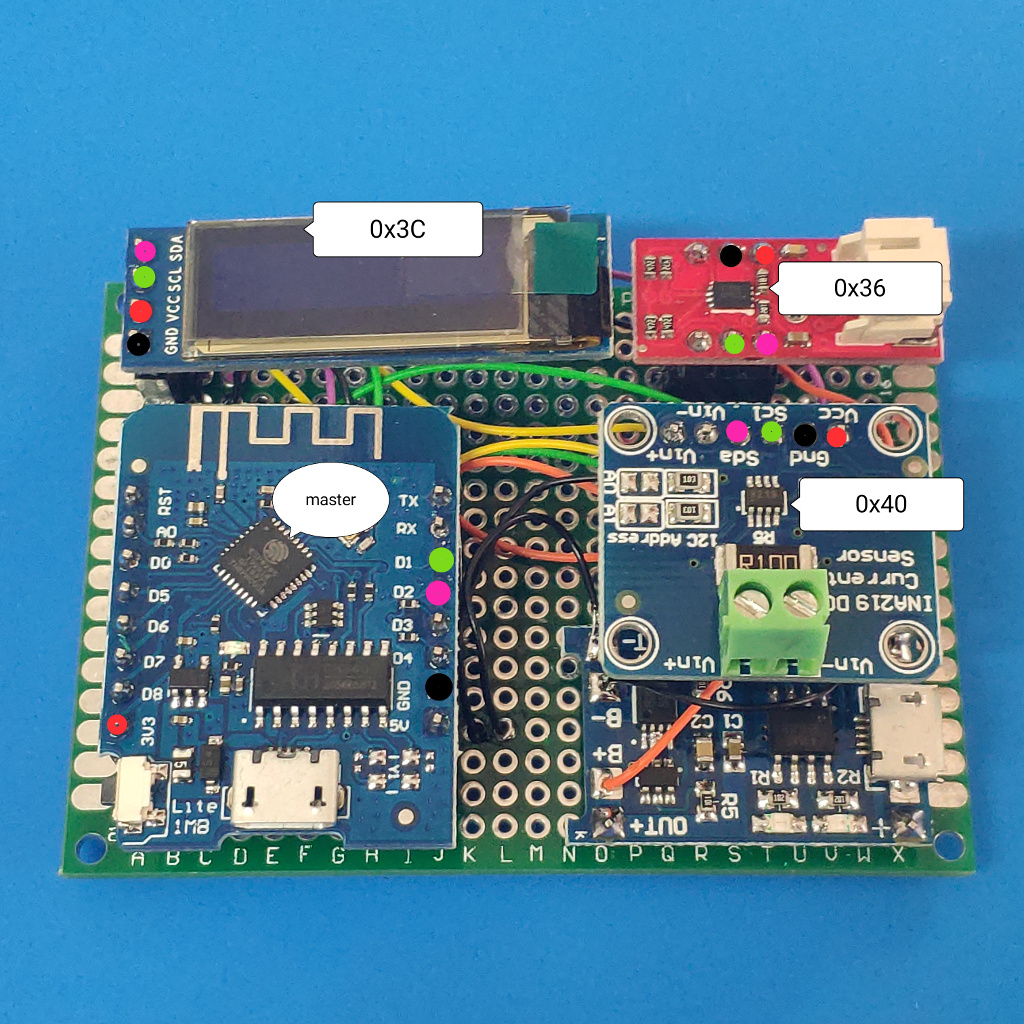
Each I2C slave has an address.
The pins VCC/GND/SCL/SDA are colored red/black/green/purple.
Testing I2C
Before you start using a library, and wondering why it does not work, it’s always practical to first check if your setup actually works. My approach to this is:
- measure with a multi meter that all conections are correct
- run the i2c_scanner and look for the results:
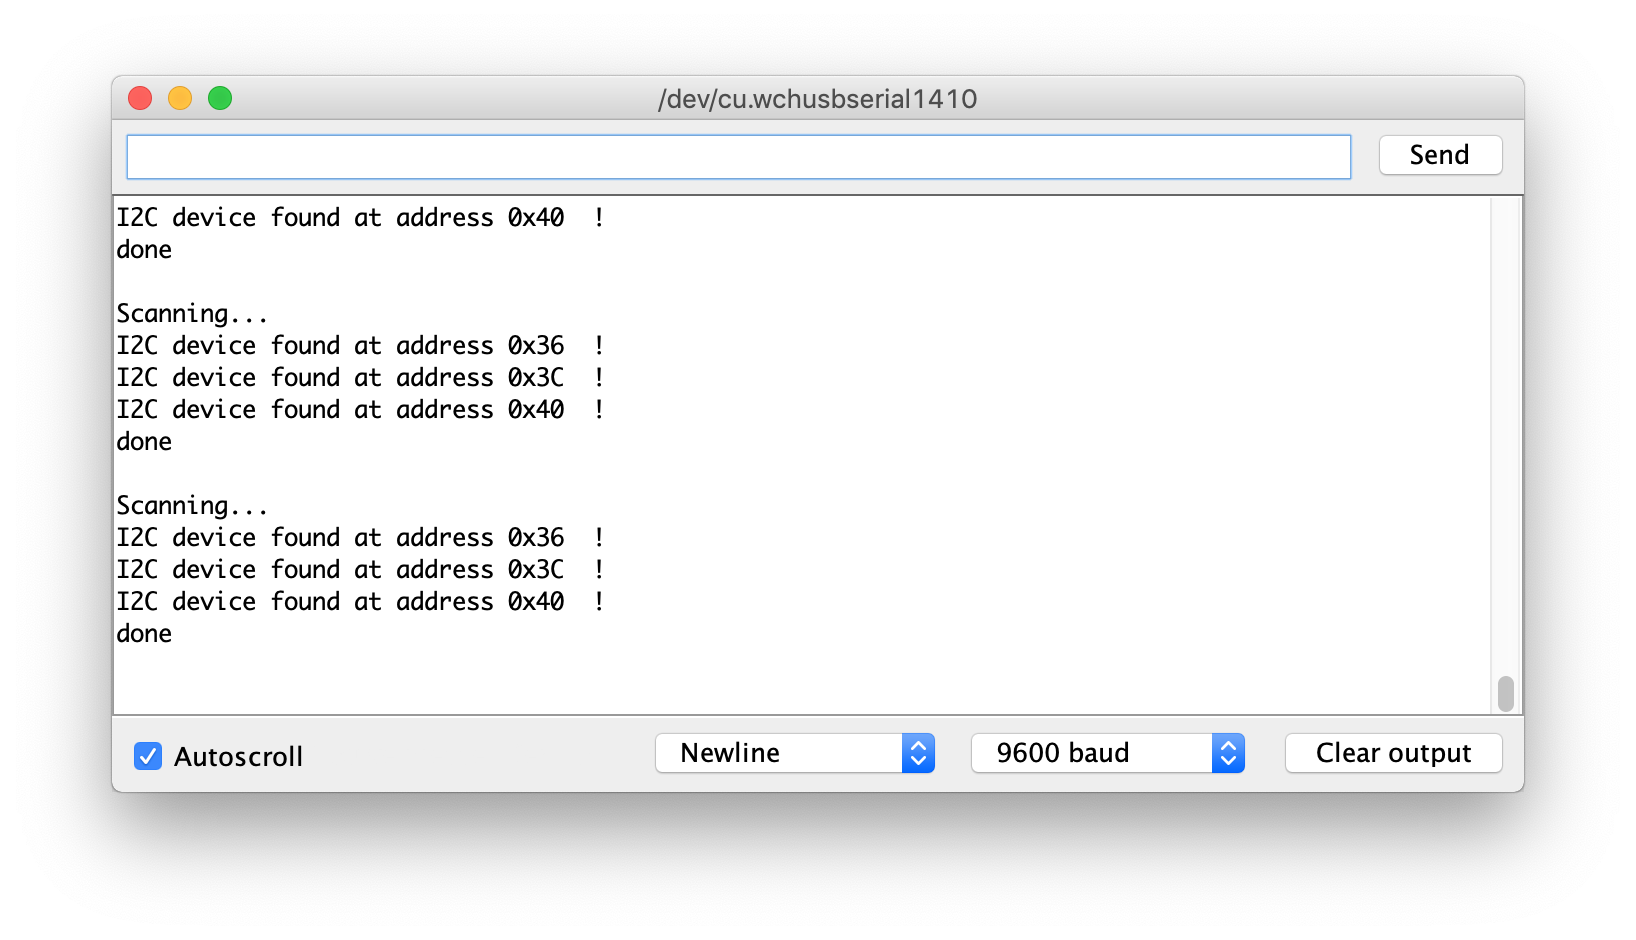
You can see the I2C devices that were found via the serial monitor.
If all devices show up, then we are good to continue.
Simple I2C example
The following example requires the u8g2 library. Install it via the library manager.
#include <U8g2lib.h>

U8G2_SSD1306_128X32_UNIVISION_F_HW_I2C u8g2(U8G2_R0, /* reset=*/ U8X8_PIN_NONE);


void setup() {
  u8g2.begin();
}

void loop() {
  u8g2.clearBuffer();
  u8g2.setFont(u8g2_font_ncenB08_tr);
  u8g2.drawStr(0, 10, "LiPo Meter V0.0");
  u8g2.sendBuffer();
  delay(1000);
}
Result:
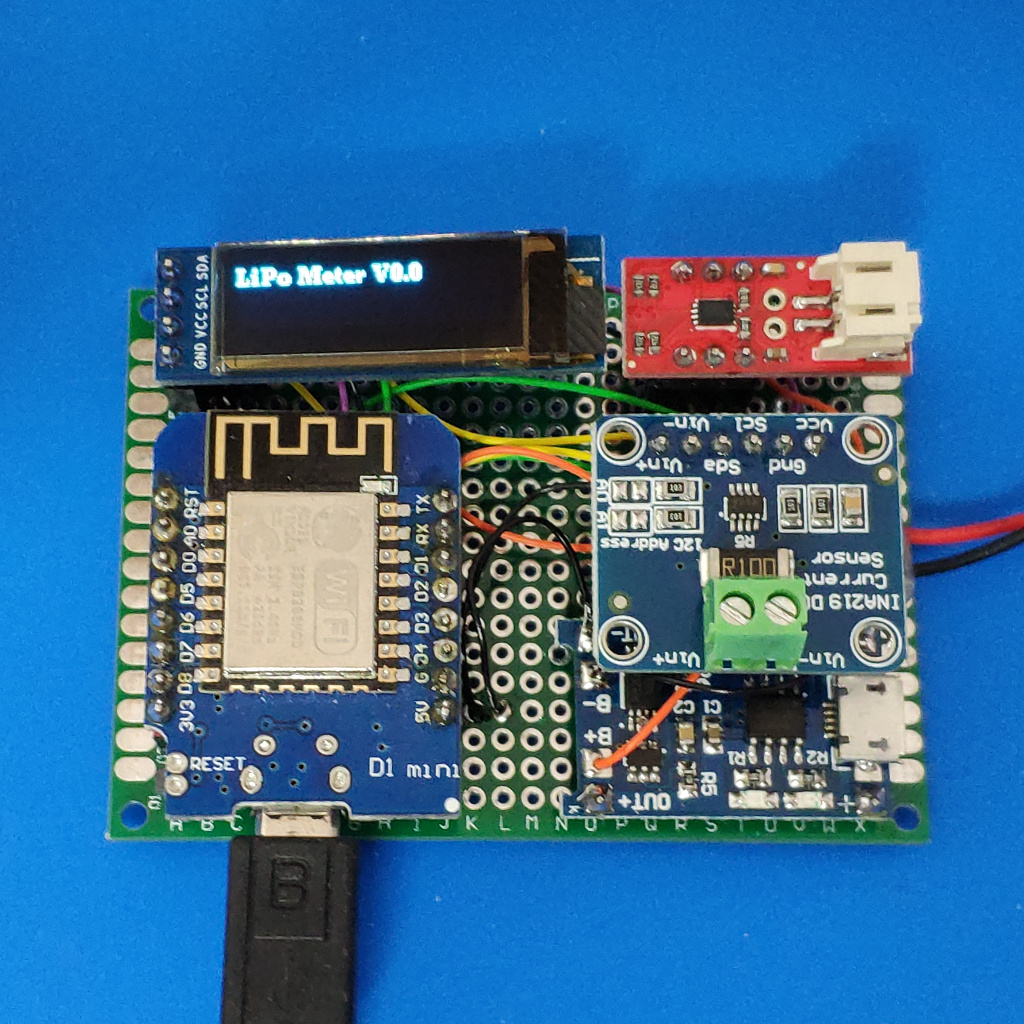
It's always a good idea to verify the setup before coding the main application.